Set and use custom filters
Throughout Routty different tables are displayed to handle any type of data.
This guide explains how to filter columns and store filters for later use.
This guide can be used on any page where you can find the filter buttons
Instructions
Change visible columns
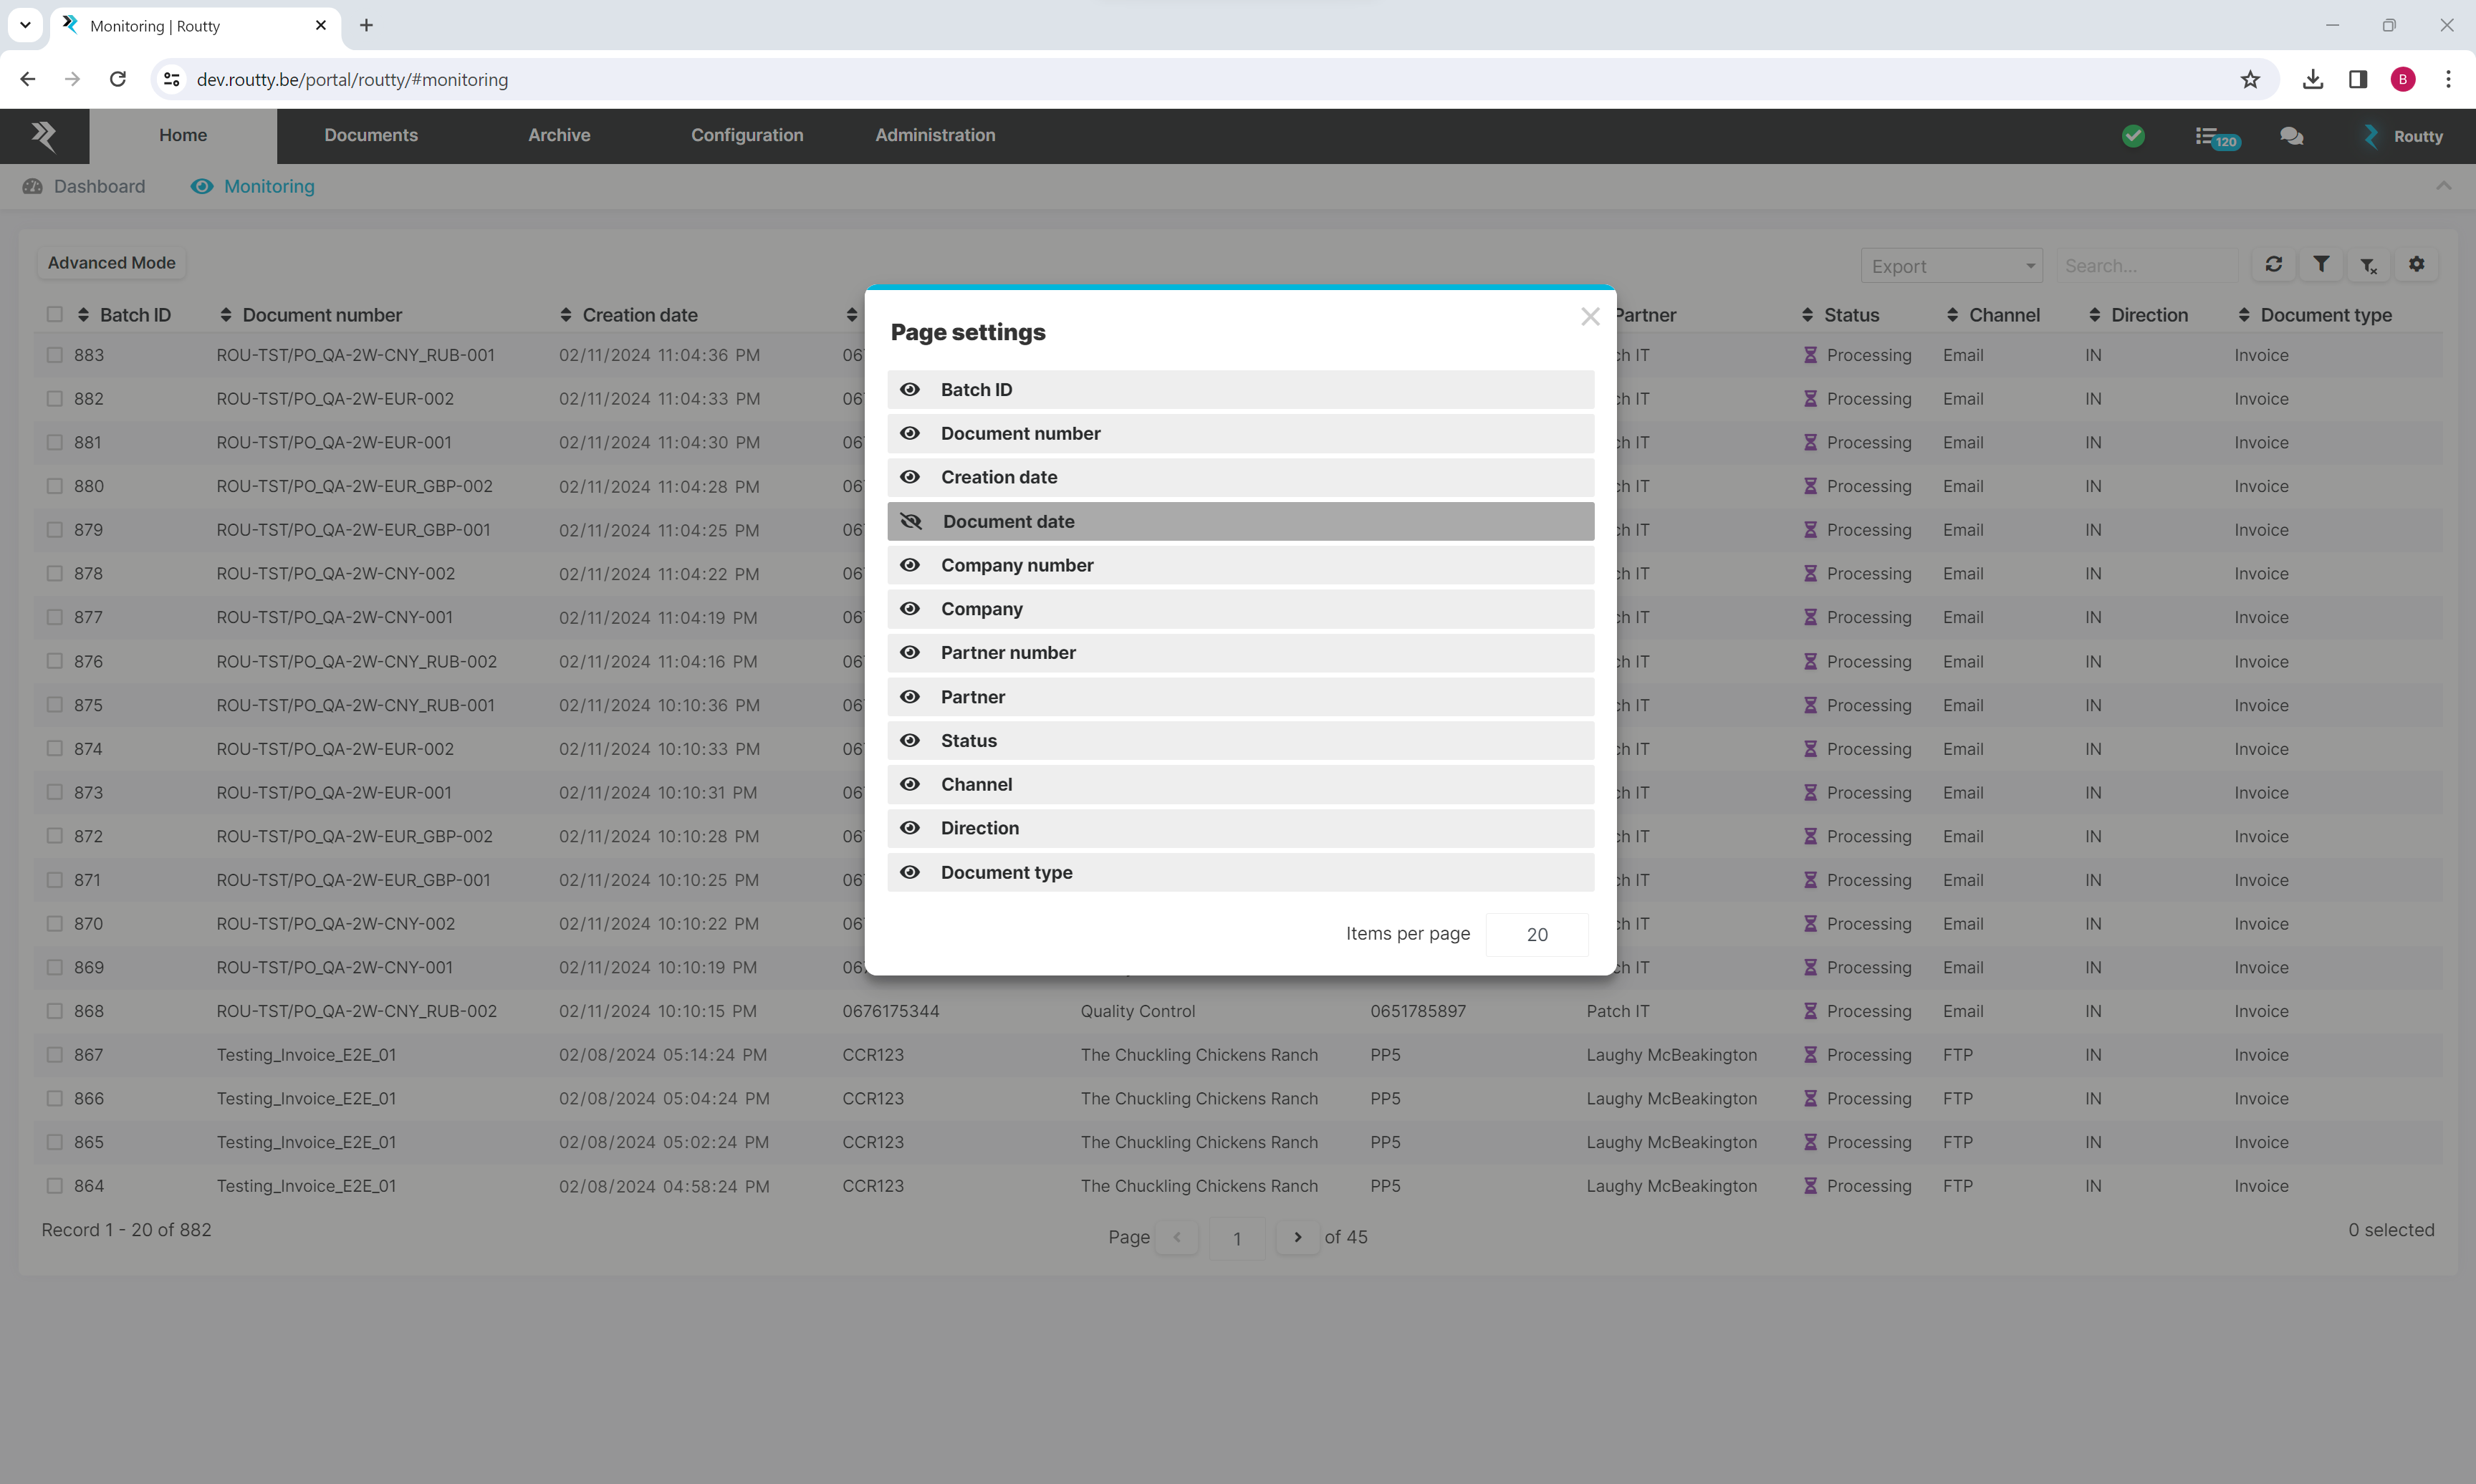
To change the visible columns in the table click on the configuration button

A pop-up will be shown with all available columns

Columns that are not visible are greyed out and have a different icon
Click on the columns to change the visibility
The configuration is automatically saved when closing the modal
Close the modal when you have all the wanted columns visible
To change the amount of visible items on the page adjust the number in the lower right corner
Filter columns
To filter a column click on a column name, either a dropdown or an input will become visible
For dates: a custom date range or default values such as this week or last week can be set
By pressing the CUSTOM RANGE option it is possible to set a custom start and end date
The CLEAR button will remove the selected range while the APPLY button will set the custom range

For other columns such as the document status column it is possible to select multiple values
To remove a selected filter value click on the x icon

To remove all filters on every column use the clear filter button

Saving of custom filters
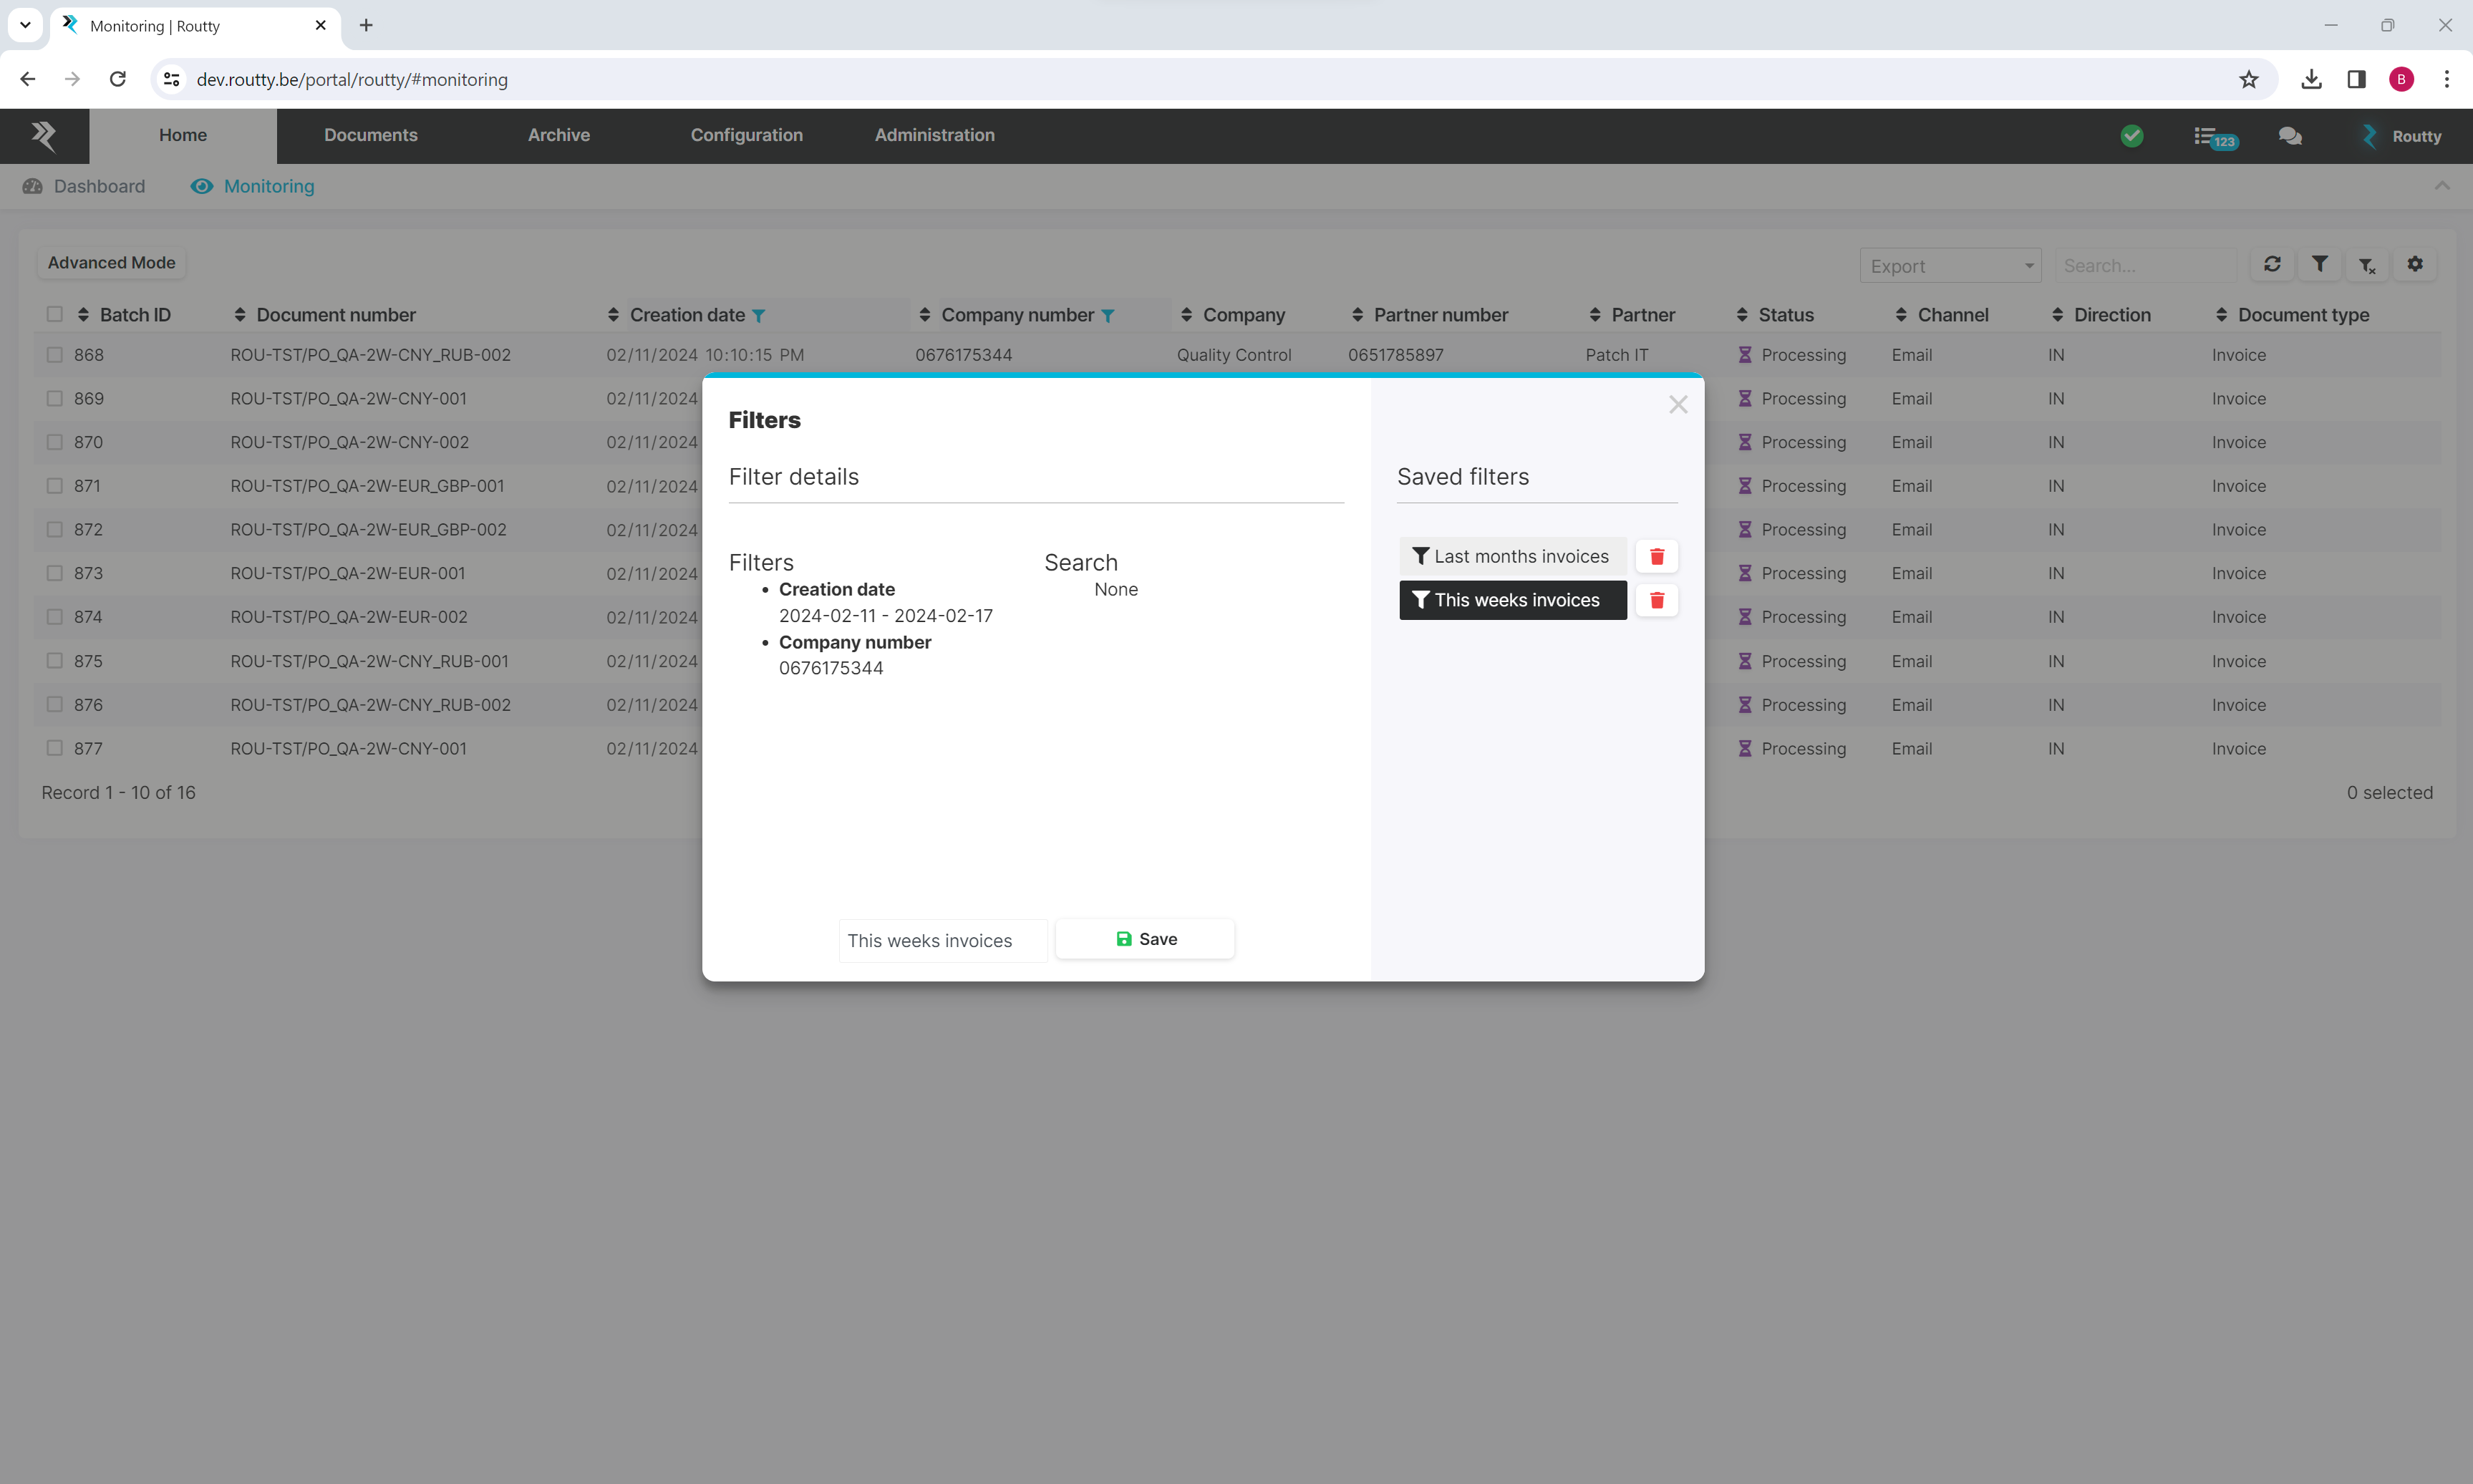
To save or apply a custom filter, click on the filter button

A pop up will show with all previously saved filters (whenever one or more are present)

To apply a filter click on the filter’s name in the SAVED FILTERS section
The current active filters parameters and values are displayed in the FILTER DETAILS section
To save a (new) filter enter a name and click on the save button
To delete an existing filter click on the delete button beside the saved filters
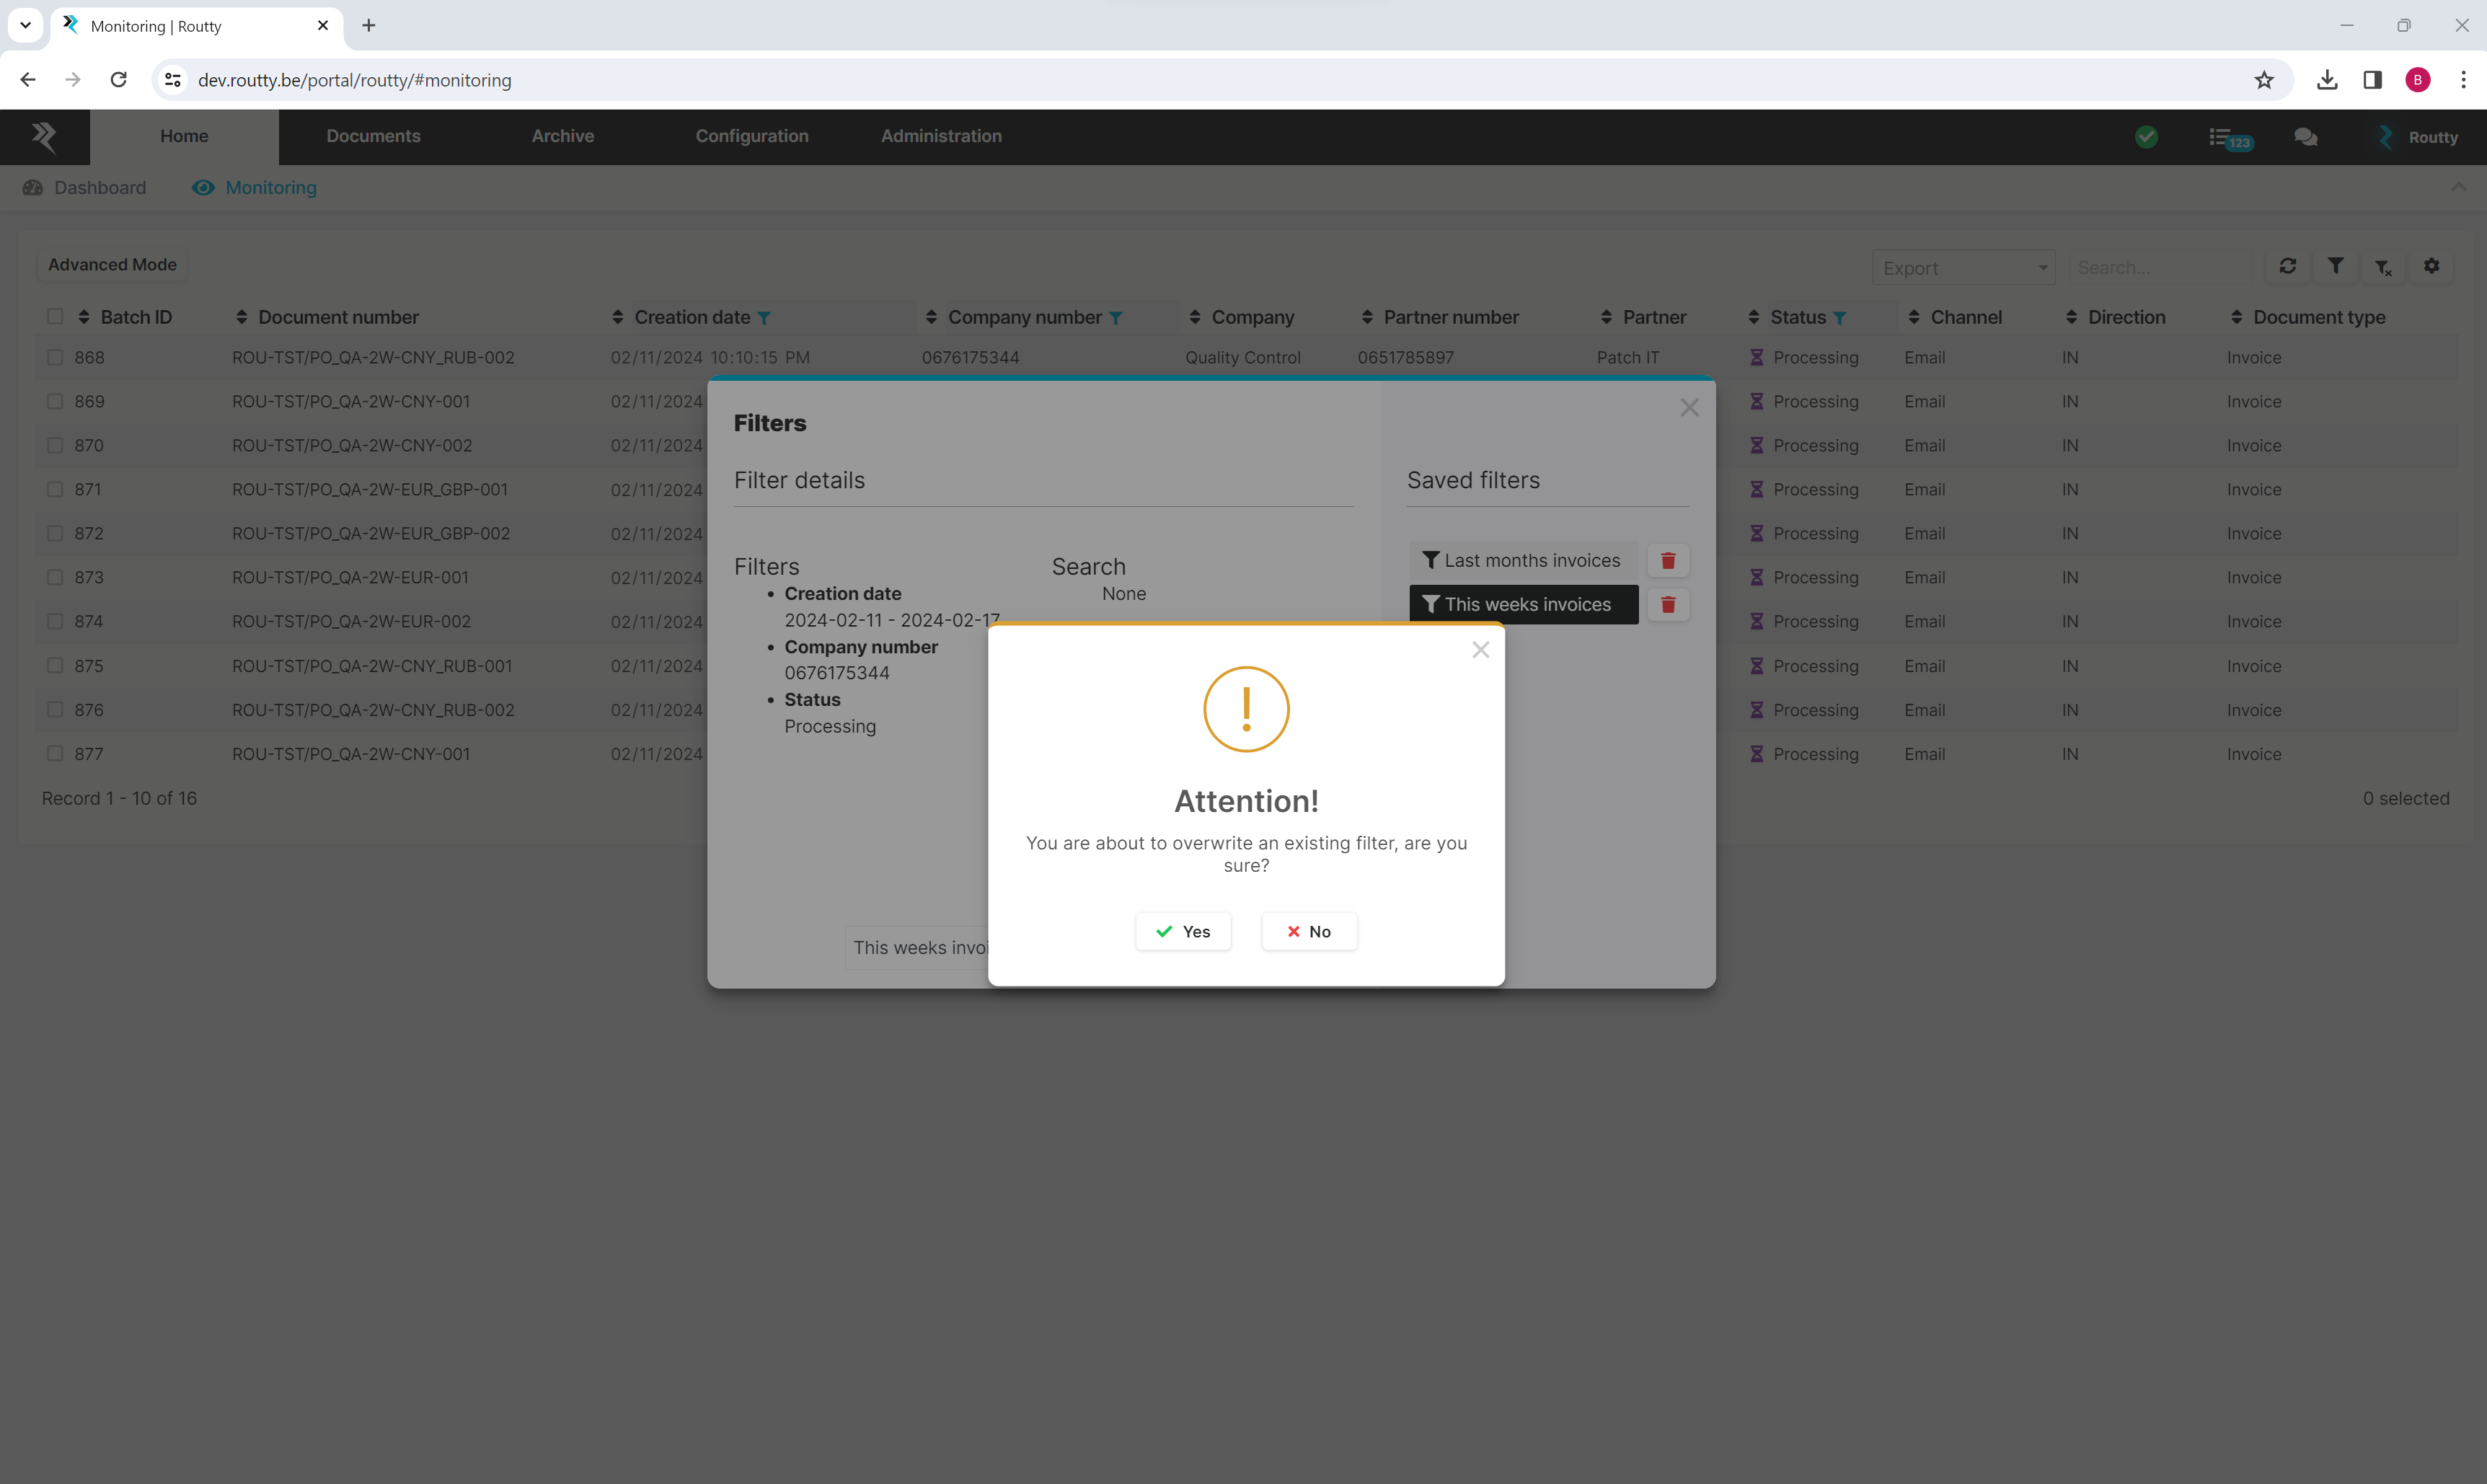
When entering the name of an existing filter it is possible to adjust the filter
A pop-up will appear to inform you that it will overwrite the existing filter
Either accept or reject the change

